For this assignment I'll be doing a Mad Scientist's lab.
I'll show you my process for coming up with all the elements for this assignment without hiding any mistakes or bad sketches... (man, I hope I don't mess this up!)
Here's my first page of notes on the tower.
Dec 7th 2010
 .
.

If my mad scientist is only 5' tall I could scale back the size of the machine and the tower to about 30' - 40' high and around 25' wide.
Dec 8th 2010

Here it is to the scale of the little sketch I did on the first page.


I like this scale better but it leaves a lot of open space above the machine but I also like the teetering feel of the tower. And here it is with the roof dropped about 20'.
Here's a 3/4 downshot of the machine and part of the wall. This took me 3 hours total.
Dec 9, 2010

Don't ask me what it is or what it does or how it supports itself... I'm still working on it. Next I'll draw in the stairs that wrap around it.
Here are the stairs
Dec12, 2010


And here it is with the mad scientist, Dr. Fritz on the three levels for scale.

Here are the floorplans.


Here is my rough layout looking from the floor up. This is a warped perspective drawing.
I started with the middle section on 11" x 17" paper and then added on the two side wings on 8 1/2" x 11" paper.
This took me about 2 hours to rough out.
Dec 13, 2010

Here's the cleaned up version which took about 3 hours.

Jan 12th, 2011
After a short Christmas break and the aquisition of a Cintiq monitor with the vow to go paperless for the remainder of this semester, here is my first rough layout of the lab.
I know this is jumping ahead in the assignment to the layout stage, but sometimes I get an image in my head and it just has to come out.
The next step is to do some projection views of the environment so that when I go into Maya to begin modelling I'll have a more accurate scale to work with.
Here's the machine skewed and straight with some suggested textures:


And here are some detail drawings of the different parts of the machine:


Tesla rods and light fixtures attached to the walls.


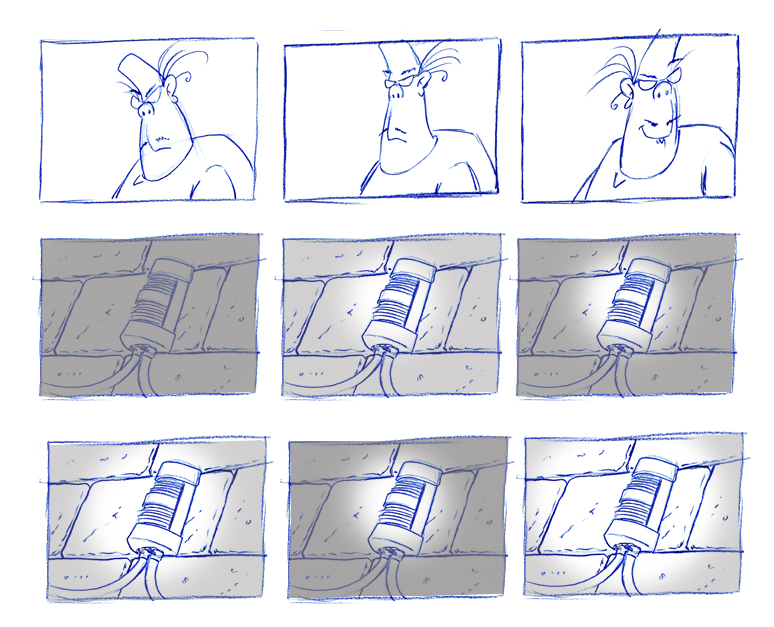
Next comes the storyboarding part of the assignment. From all my designs, I now begin to select the various camera angles that I will use
to get the character from the bottom of the stairs, up to the top.
It's here that I start to put together a bit of a plot line and give my character (and camera) a reason for moving through the environment.
Here are the first few thumbnails to start things off.

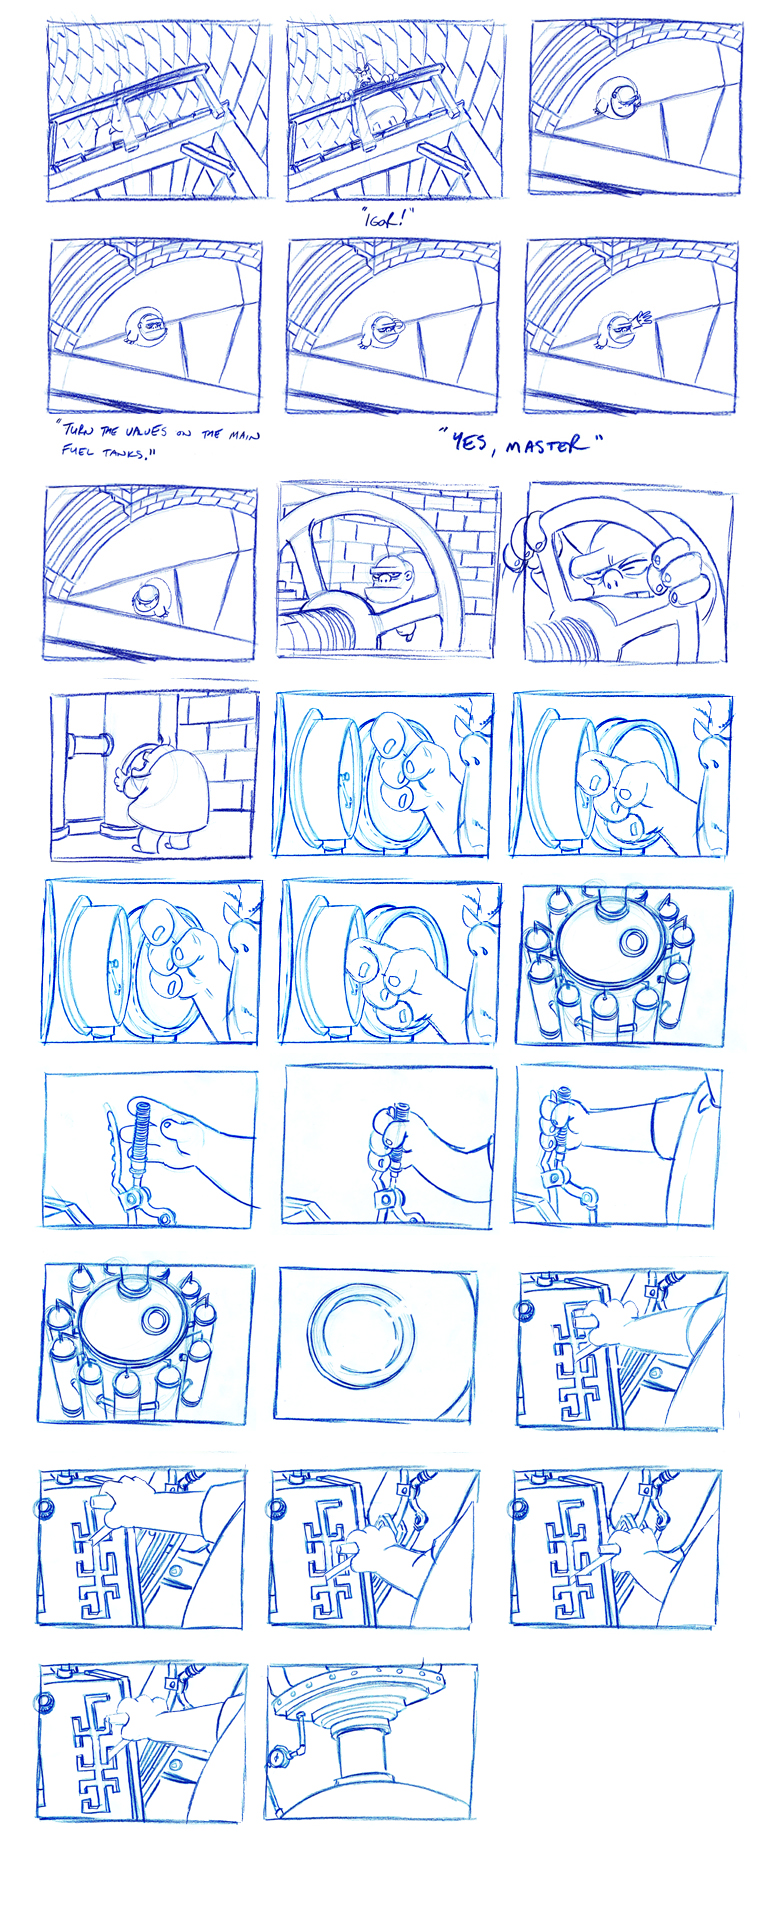
I have my character, "Dr. Fritz" enter through the doorway and come down the stairs. The camera pans with him as he goes across the room to the wooden stairs, then turns and walks up.
The camera pans past him to show the top of the "Trans-dimensional Macro-cellular Accelerator Portal Generator" (still working on the name). We then cut to a rear view of him walking
up the second stairs to the first platform. Scene 3 shows him moving towards the control panel (not quite sure where to put it yet).
One of my students at Humber saw the design for the control panel and suggested that I have a Hamster Wheel inside and
the hamster is the one that powers the entire machine.
Thanks Rob.
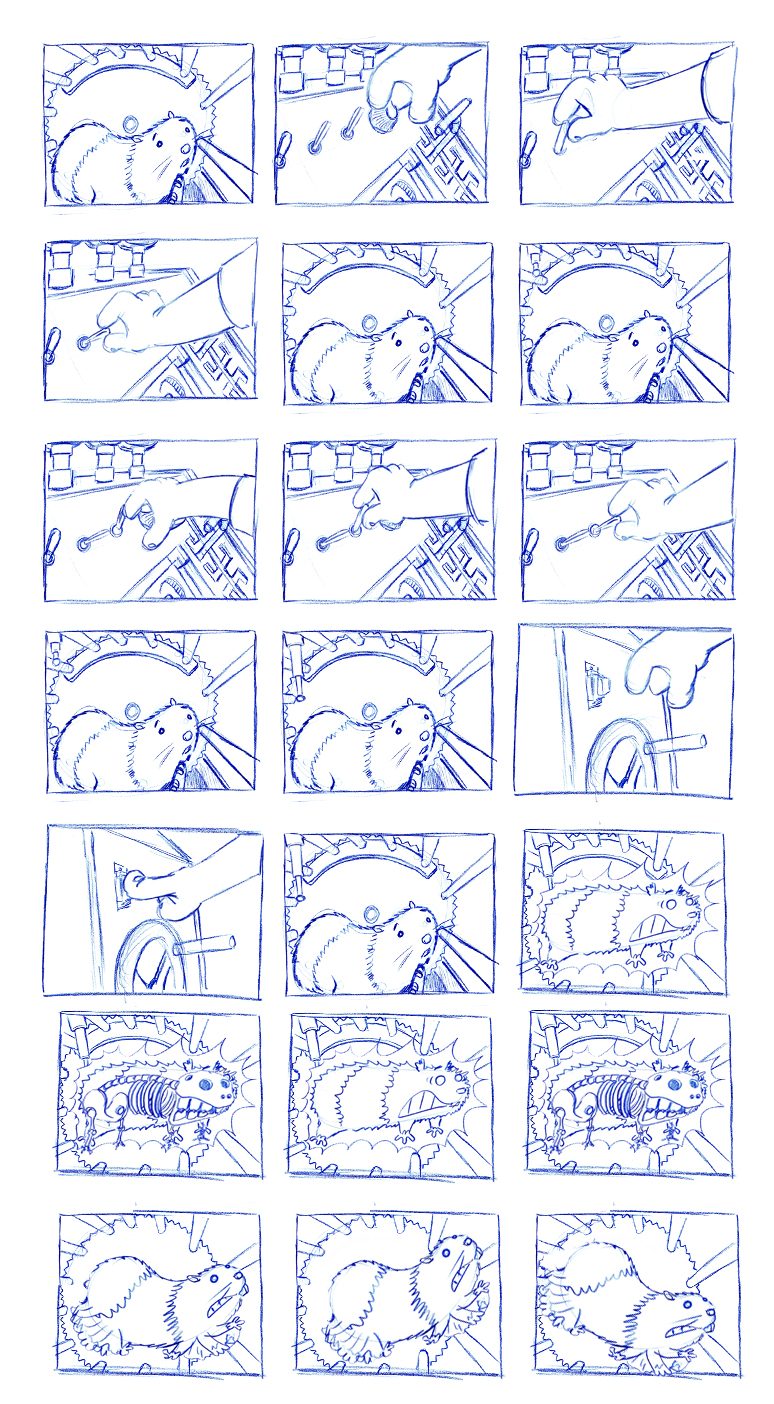
In this sequence, Dr. Fritz gets the hamster moving so he can start generating some power.
Here are some images from the Maya set that one of my students, Sarah Faber built from the designs.


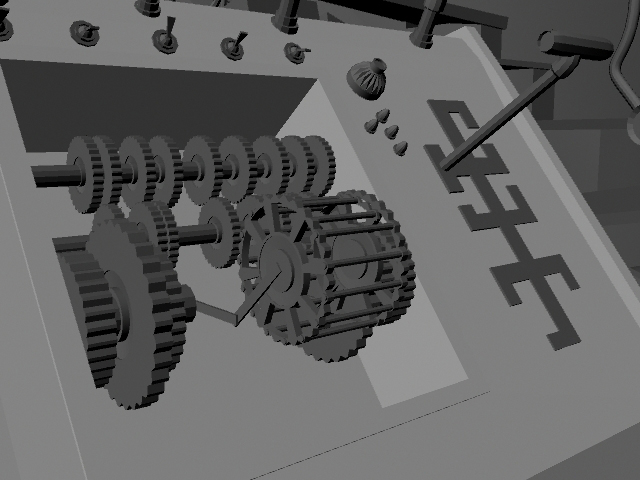


Sarah will also be doing the textures for the set. Here's a link to her site.