|
|
|
|
|
|
|
|
|
|
|
|
|
|
|
|
|
|
|
|
|
|
|
|
Mustapha & Cassim Maquette
Class #1 - 3 hours
|
|
|
|
|
|
Here's a handy quick index to get you to the point you want to get to without having to go through each page.
Class 1 - Building the Wire Frame (you're already here, just scroll down)
Class 1 - Tin Foil Bulking
Class 1 - Sculpy Bulking
Class 2 - Sculpting Mustapha's Head and Face
Class 3 - Detailing Mustapha's Head and Face
|
|
|
|
|
|
|
 |
|
|
|
|
|
|
|
Starting with the same materials as usual:
• A block of wood for the base
• Coat hanger wire
• Plyers
• A glue gun
• Aluminum Foil
• An assortment of sculpting tools
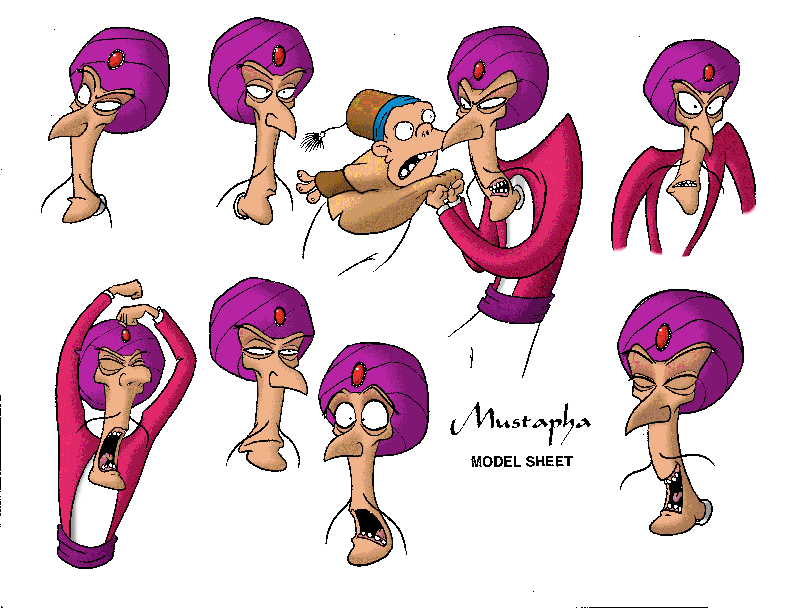
I began with the design for the characters, in this case: Mustapha and Cassim, two characters that I designed back in 1992 for my book, Designing Cartoon Characters for Animation Vol. 1.
Mustapha and Cassim are two thieves from the story of Ali Baba and the 40 Thieves. Mustapha is the leader of the thieves and Cassim is his bumbling sidekick/comedy relief.
I chose the pose of the two of them together where Mustapha is grabbing Cassim by the shirt and pulling him up to his eye level. It's a fairly difficult pose but I've been wanting to do this for quite a while now.
You can click on the model sheet to see a full sized version of it. |
|
|
|
|
|
|
 |
|
|
|
|
|
|
|
|
 |
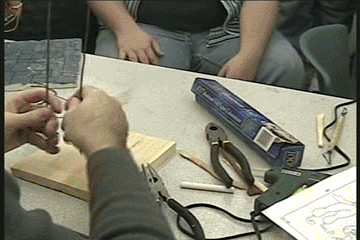
I begin by cutting the hook off the coat hanger as the twisted part tends to be a bit difficult to work with. |
|
|
|
|
|
|
|
 |
I measure the height that I want the character to be and bend it at a right angle for the shoulder, then measure the width of the shoulders and then bend it down to form the opposite leg. I then cut off the wire at the same length as the other one.
Make sure to allow enough excess wire where the feet are for the wire to go into the wooden base (about 3/4"). If you don't allow for the excess, your character may come out shorter than you expected and lead to some proportion problems later on. |
|
|
|
|
|
|
|
 |
Next, I take the wire and position the two ends on the wooden base to get an idea as to where I want the legs to be in the final sculpture.
I then mark these points with a pencil or just make an indentation into the wood by just pressing down with the wire tips. |
|
|
|
|
|
|
 |
Now I drill a couple of holes into the wood. I make the hole all the way through so that later on, if I need to, I can add some glue for support from the openings below. |
|
|
|
|
|
|
 |
I place the ends of the wire into the holes. Don't glue them into place yet. You might want to change the placement of the feet as you go through the process of bending the wire into the pose you're going to do. You might end up having the feet further apart or closer together. You can then just drill another hole. |
|
|
|
|
|
|
 |
I start to bend the legs, beginning with the knee joint and work my way up. The placement of the knee joint depends on the proportions of the character. Be sure to keep referring to the model sheet or your design that you've drawn for the pose to be sure it's the same. What you do at this stage will dictate the proportions of the statue later on when you ad the modelling clay. At that point you won't be able to do any revisions unless you strip the whole thing back down to the wire, or start all over again from scratch. |
|
|
|
|
|
|
 |
Next, I move up to the hips. |
|
|
|
|
|
|
 |
I then make some adjustments to the back and shoulders then spin it around to be sure I'm o.k. with where the pose is going so far. |
|
|
|
|
|
|
|
Next set of steps
Back to Sculpture Index
Back to Homepage |
|
|
|
|
|
|
