Pendulum Swing
Weight Part 3
The pendulum swing is a very common action within animation. Any time you animate a cartoon character with arms and legs you will be using a form of pendulum. The pendulum (by this, I am referring to a clock pendulum) swings on what is known as the fulcrum. It is a mechanism inside the clock that the pendulum is attached to. In our character example, the fulcrum is the shoulder, elbow, wrist, knuckles, hip joint, knee and ankle. Each of these has an appendage that swings from this point. Therefore, any time you move an arm, leg, hand or finger, you are using a pendulum movement.
Because the pendulum is firm like the bones in the appendages, all actions will have an arcing path of action to them. An arc is made up of a ‘C’ curve. You may have a shallow curve or a very round curve, it all depends on the angle of the action taking place.
This assignment will help you to understand the basic principle behind the arc movement. Later we will explore more complex actions involving the pendulum action but for the next 3 assignments we will focus on different aspects of the pendulum.
Animate a pendulum swinging back and forth.
Purpose and Principles Involved
The pendulum swing is a simple exercise which employs the use of the following principles: key extremes, arc path of action, slo-in and slo-out, and the repeat cycle. The pendulum action is used in the walk cycle in the arms and the legs, and the head movement. It is employed any time you move an object on a fulcrum point. An arc is the most common path of action you will ever use.
In this exercise work loose and rough. This is a very simple assignment and is given to allow you to get used to all these basic principles:
• The Effect of Gravity
• Realistic Timing
• Use of Arcs
• Weight
• Slo-in and slo-out
• Use of the Repeat Cycle
• Spatial Relationships
• Accuracy in Drawing
• Reading and Following a Timing Chart
• Maintaining Volume and Proportions
• Flipping Your Drawings
Thought Process
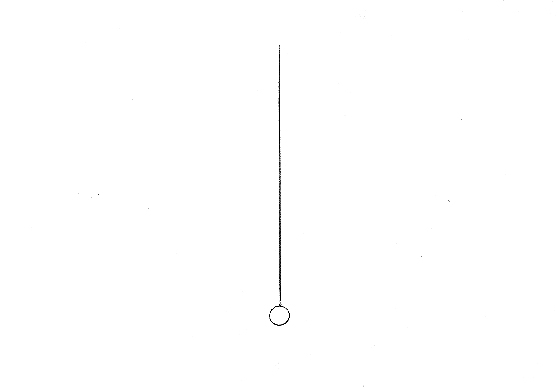
On your animation paper, select a point in the center, then move up 2” and draw a small dot. This will be the point that your pendulum will swing on, or the fulcrum point. From this point, draw the arm of the pendulum out on an angle. Add the ball on the end. Label this drawing 1 in the lower right corner.

Take another sheet of paper and place it over top of the first one. Draw the arm of the pendulum out on an angle from the fulcrum point in the opposite direction of the first drawing. (You could also take drawing 1 and turn it over, with the pegs still on the bottom. Place the blank paper over top and with the light table on, just trace off the position of the pendulum. It might seem like cheating, but it’s really just a shortcut.)

Now you must deal with the timing. You have your two key positions. How long do you want the action of the swing to take? If it’s a clock pendulum, it will take one second for the arm to swing from one side to the other (24 frames or 12 drawings, shot on two’s). Therefore, the second drawing will be # 12 . Next, you need to determine the timing of the motion, specifically, whether you need a slo-in and/or a slo-out on the ends.
In this case the action of the pendulum requires a slo-out from key 1 and a slo-in to key 12. This is so you can simulate the illusion of weight and gravity. As the pendulum swings from side to side, it actually comes to a stop at each extreme; the point where the pendulum changes direction. Since no object should move from a static position to a constant speed in two frames, (that’s like getting into a car, starting it up, putting it into drive, and stepping on the gas and going instantly from 0 to 60 miles (100 kilometers) per hour. The “G Force” would send your eyes out the back of your head). Therefore, we require a slo-out to show the proper acceleration and a slo-in to show the proper deceleration. Basically, it’s gravity that is acting on the pendulum.
As we all know, gravity is that thing that keeps everything from floating away, like it does in outer space. Hold out your pencil at arms length and let it go. It drops to the floor. This is gravity in action. (Don’t drop your pencil too many times or you’ll break the lead inside and you won’t be able to sharpen it anymore.)
Your timing chart for the pendulum should initially be broken down into 1/3’s. (You’ll see why in a bit.)
If you were to do the half-way position (#6) straight down like this, it won't work.
If you cheat on this assignment by just doing drawings 1 and 6, then flip the drawing #1 over and trace it off on a new sheet of paper and call it 12, then do the same thing after you've done the inbetweens 2, 3, 4, and 5. Once they're flipped and traced, 5 will be 7, 4 will be 8, 3 will be 9 and 2 will be 10. That leaves one drawing missing - #11.
This breakdown will produce eleven drawings rather than twelve which will create a swing every 22 frames rather than 24 (1 second). If this is a cuckoo clock pendulum, you’d want it to keep perfect time, thus, one swing every second. However, the eleven drawing cycle would lose one second every 12 swings. I realize this is being slightly anal but it would be important if the clock was swinging to a musical beat that hit every second. An example of this would be in the film Pinnochio, in Gepetto’s workshop when the clocks are all ticking to a beat (which may or may not be a one second beat, but the timing must correspond).

You will need to do # 6 as a 1/3 inbetween and then finish the 5, 4, 3, and 2 inbetweens as halfs back up to #1. Once these are completed, do the flip and trace cheat again for the drawings 7 to 11 - 6 is 7, 5 is 8, 4 is 9, 3 is 10, 2 is 11 and 1 is 12. This will now give you a total of 12 drawings.
My general feeling on this is that if you can cheat to save time and effort, yet still achieve the same quality, end result that you would have gotten had you not cheated, then go ahead and do it. In a nutshell: It doesn’t matter how you get it done, just so long as it looks good.
For this exercise, don’t worry about being perfectly clean in your drawings, keep it rough but not messy.
Pencil Test
You don't actually have to shoot a pencil test of this animation to see how it works, you could just flip the drawings in your hand to see the action.
Watch a short video showing how to flip your final animation stack.