Here are my versions of the bonus drawings. The rough blue drawing is an eyeballed version where I didn't use any ruler or in the case of the two point perspective views, any actual vanishing points... basically they're my best guess.
The second version, cleaned up in black pen using vanishing points and a ruler.
Both are on 8 1/2" x 11" paper.
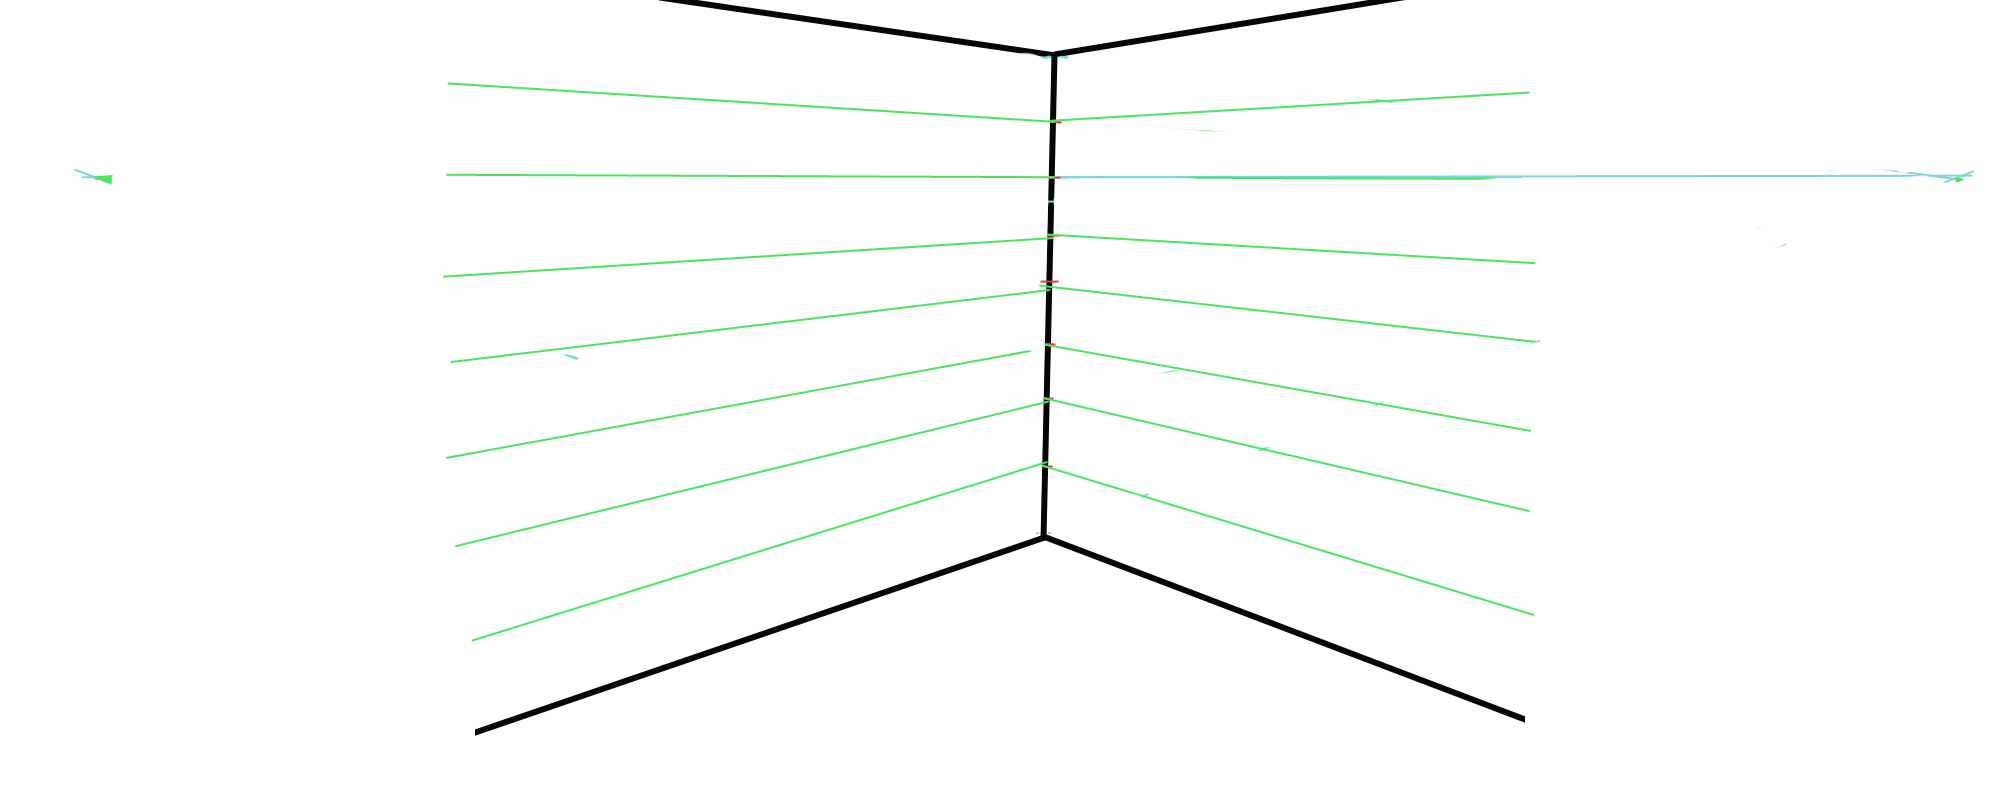
1) Horizon line at 6' with camera centered at 3'.


My first step is to always draw the vertical line that represents the corner of the room that I'm looking towards. I then decide where the top and the bottom
of the line will end, this creates the point at which the ceiling and floor begin. By making this decision, I'm also deciding how far away from the corner the
camera (or the viewer) is. The shorter the line; the farther away the camera is, and the longer; the closer it is. I also have to decide where I'm going to place
the camera center. This is also known as the focal point or in layman's terms, it's what you're looking right at. this will determine whether you see more of
the floor than the ceiling (which is usually the normal way of viewing an environment), or in special cases, if you want an up shot, you could show more
ceiling than floor... or maybe no floor at all. In the example above, my camera is centered at 3', so I'm looking slightly down and you can see that there is
very little of the ceiling in the view. To do this, I moved the end points of the corner line up.
Next, I'll draw in the horizon line. I can find this exact point by subdividing the corner line into halves. In the case of this environment, the walls are 8" high.
Divide the line in half and that's the 4' point. Divide this in half again and you'll get the 2' and 6' marks. Dividing once again and you can find all the 1' points.
Now I need to find my vanishing points. If you look at the floor plan with the camera placement, you can see that the camera is positioned in the doorway
and it's looking towards the corner, but just shifted over to the left a bit. If you've been in any of my perspective lectures, you'll remember how I grill you
on finding a vanishing point within an environment. In this instance the two vanishing points are straight towards the two walls from where the camera is positioned.


I then decide on how much of the room am I going to see through my "field of vision".
Where the vanishing points touch the green line that represents the paper I'm drawing on, you can see that the two points are just outside the field of vision
area. If the field of vision area is going to be the 8 1/2" x 11" on the paper, then the vanishing points are about 2 - 3" off each side of the page on the horizon line.
Once these are decided upon, I can then draw the lines that represent the ceiling and floor. They extend from the vanishing points through the top and bottom
of the corner line.

I can then subdivide the corner line in halves. The ceilng to floor height is 8', so it will subdivide evenly down to 1' increments. I then draw lines from the one
vanishing point on the left side, across, through the 1' marks.

Then I do the same thing from the right side vanishing point.

I don't actually draw the entire line from the vanishing points, only along the surface that I need them to be on. This will save me a bunch of erasing later.
I can then box off the grid on each wall by drawing vertical lines to make squares along the walls.

They don't need to be super perfect, just so long as they look right. These lines will help you determine the placement and height of the boxes that are touching the walls.

I usually draw in the floor grid next, using the intersection points along the two floor lines.

I use these to determine the depth of the boxes and also the placement of the boxes on the floor plane.

.

Now I'll use the wall grids to determine the height of the final two boxes.
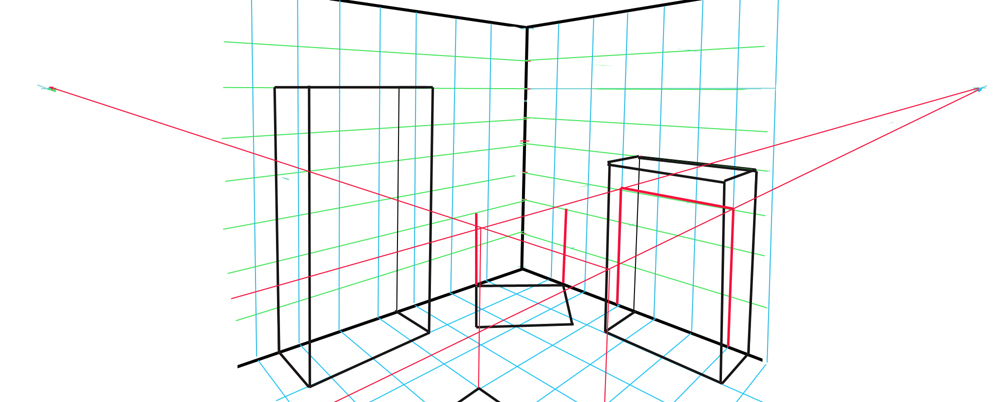
Using the two vanishing points I can then project the top lines of the table in the middle of the room. The two intersection points on the corners show me where to drop my
vertical lines down to the floor.


For the box in the corner, I'll use a single vanishing point and the lines along the walls for the height to complete the box.


And now everything is completed and it just needs to be finished so the boxes look solid.

Taa daa. Some simple shading to add depth and solidity... not necessary but it gives a better idea of the finished room.
If I wanted to, I could also go back over it and add design details to make the room look as though it has actual funiture in it..
2) Horizon line at
7' with camera centered at 3'.


