Here is where I'll post up all the Layout assignments throughout the Christmas Break.
Assignment #4 Dec 30th
Here's the assignment that we'll be using later on in 2nd semester, so if you want to get a head start, you might want to follow along now.
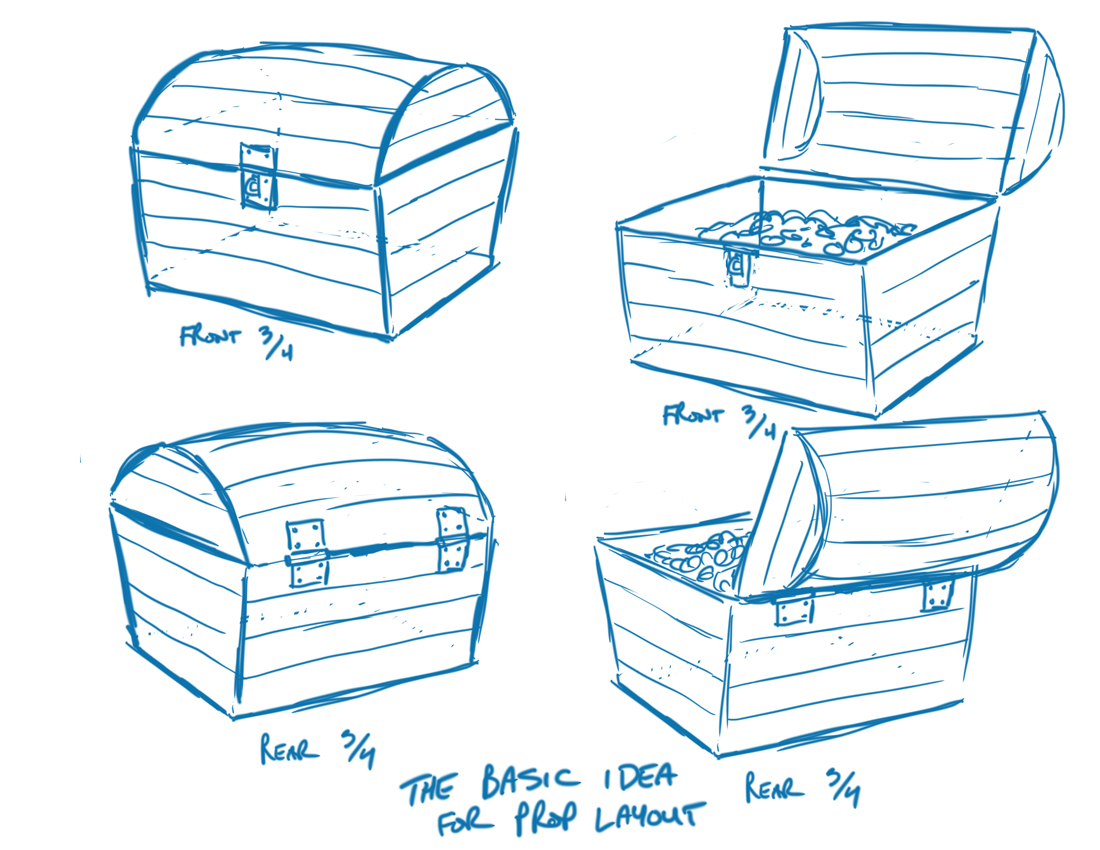
Using the design sheets I've provided here you will create 3 layouts from 3 different points of view within the room. First though, I want you to come up with a design for a treasure chest. Do a 3/4 front view and a 3/4 rear view as well as a view with the lid open, to show the treasure within. I will also need a design for the padlock and the skeleton key for it. Try to make it look as "pirate worthy" as possible.
The chest will be located right beside the trap door on the floor in the space indicated in the location design.
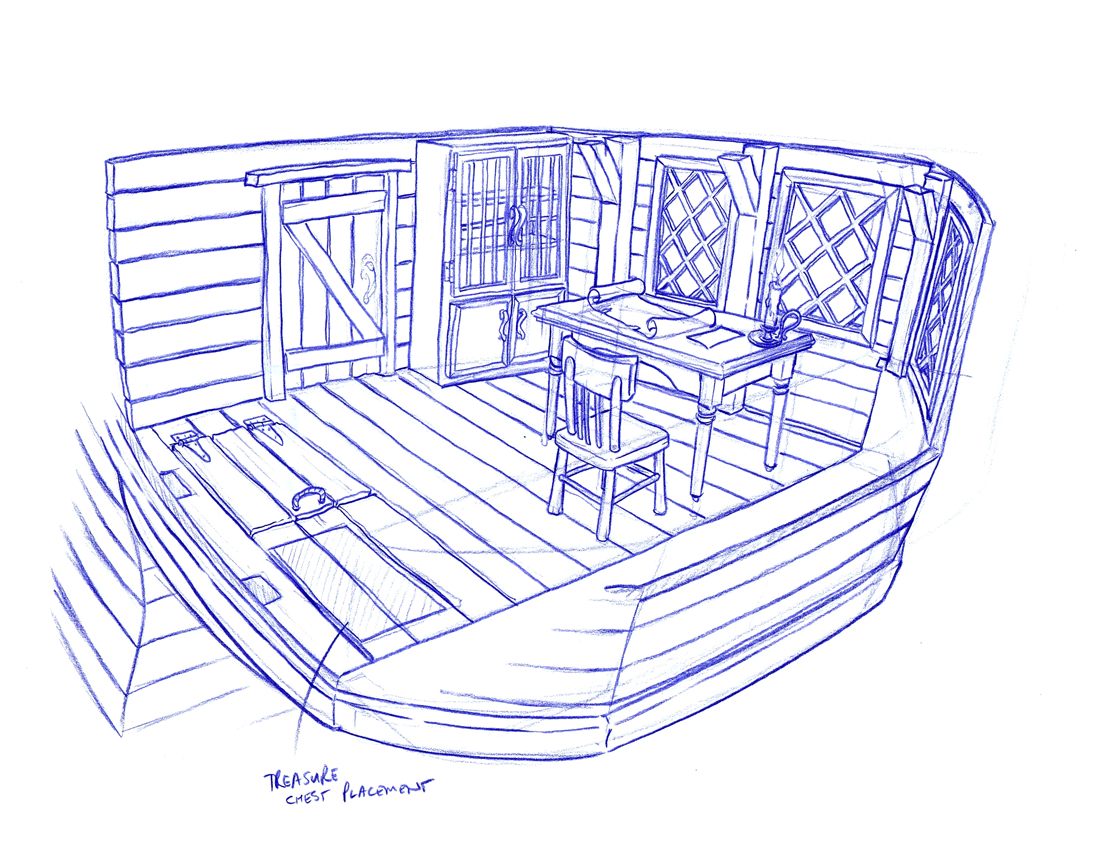
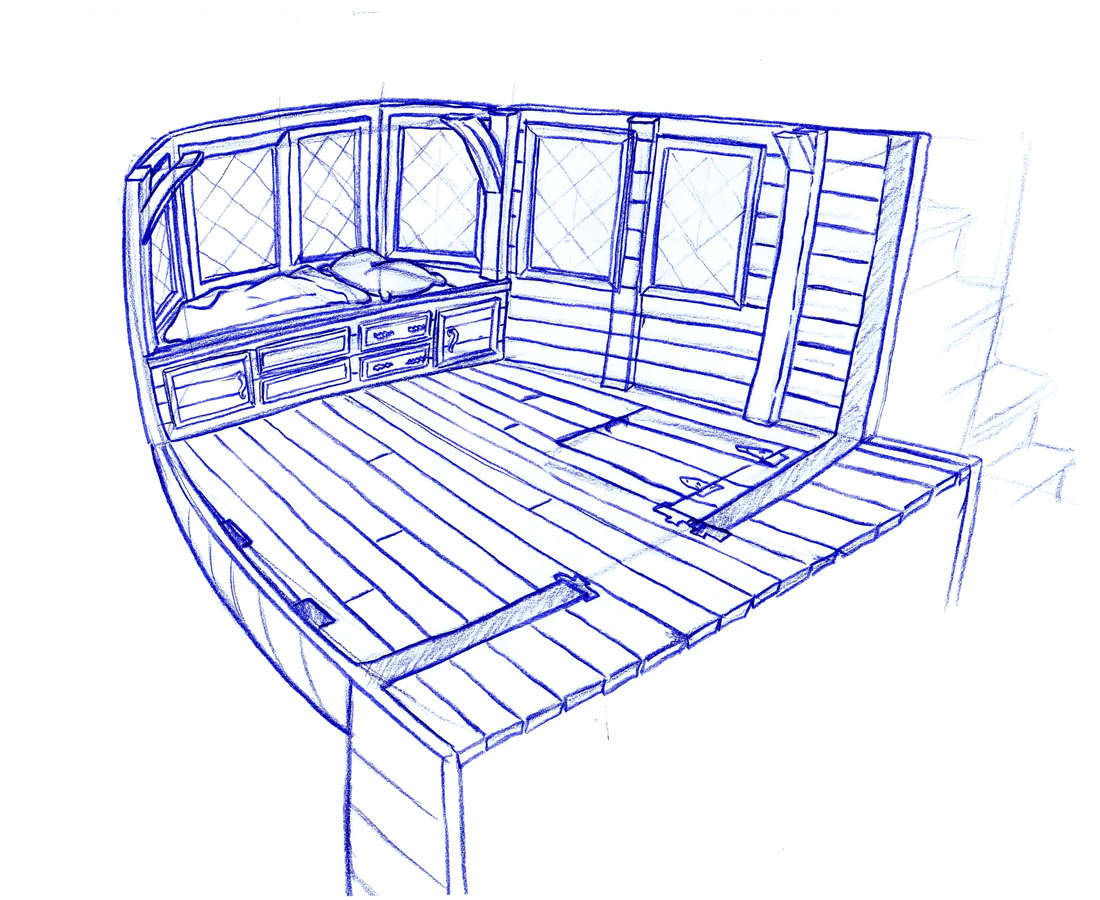
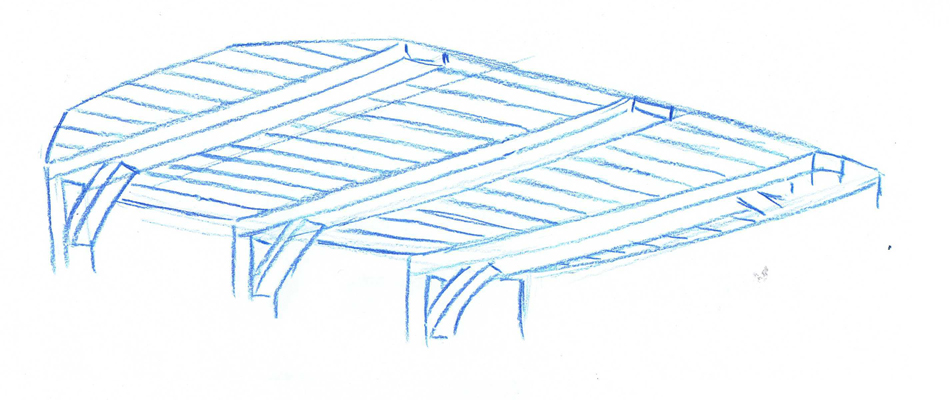
Prop Design
Here's the standard layout for a prop sheet. Use this as a guide when designing your own treasure chest.
Of course, I want your design to be way cooler than this.
Same thing goes for the padlock and key designs.
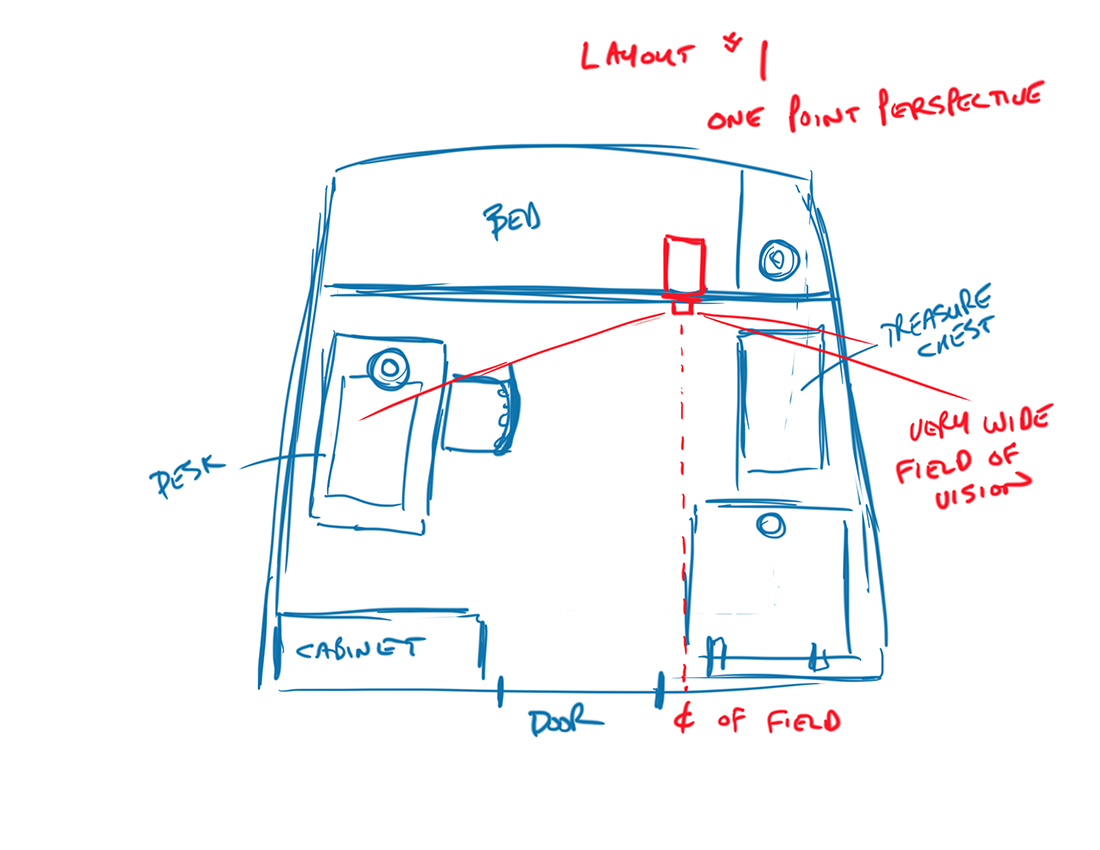
Here's the floor plan with the camera position.
Now that you've designed the treasure chest we can start into the layouts.
Layout #1
Position yourself 8 inches off the floor with your head right up against the cabinet below the bed. Your center of vision will be just to the left of the door. You'll see the end and side of the treasure chest to your left very strong in the foreground and to the right will be the chair and desk. You should see the top of the back of the chair within your field of vision.
You can have the treasure chest open or closed. The door to the cabin is closed.
11" x 17" - horizontal field.
Go.
Prop Design
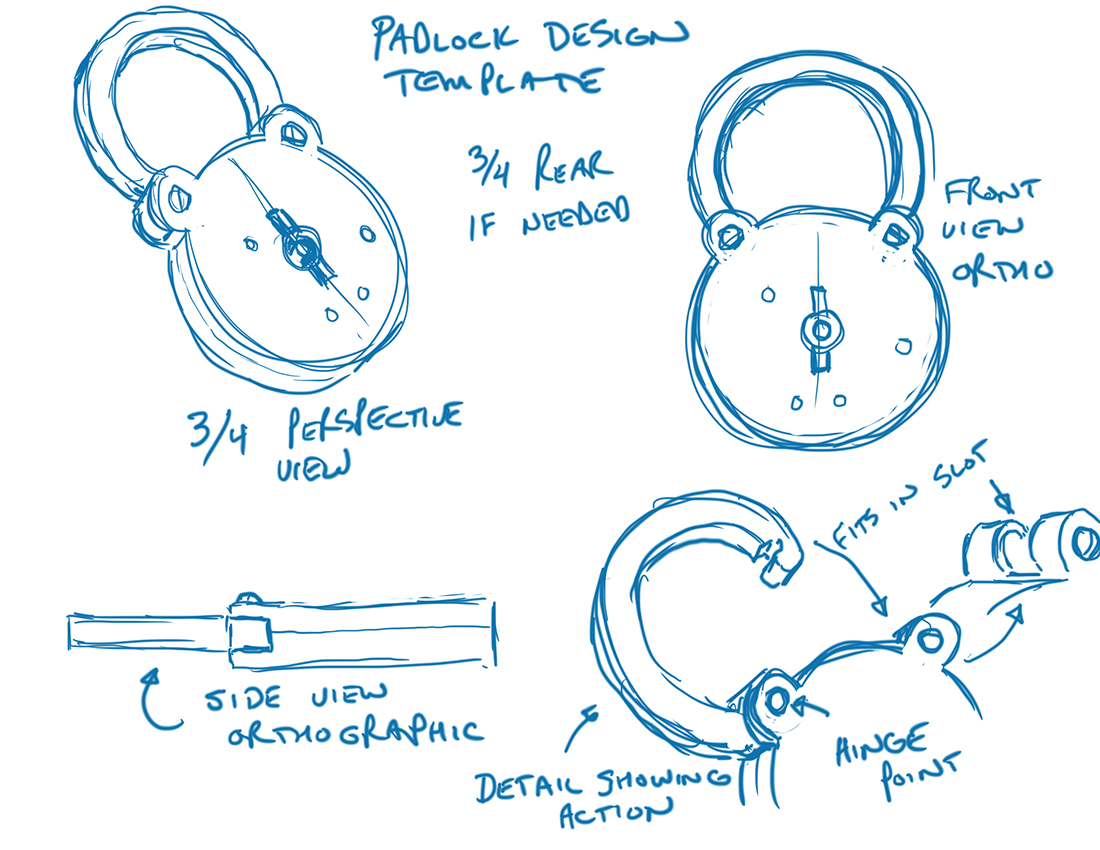
Here's a basic template for the padlock design. I've included orthographic (straight on / no perspective) views as well to make modelling in 3D easier. It also clarifies the dimensions and measurements exactly. If they are done properly, you could project them onto a plane and model the object exactly to the design.
Again, this is just a rough sketch to give you the template for the design sheet. I want the actual design to be way cooler with some neat detailing. Same goes for the key design.
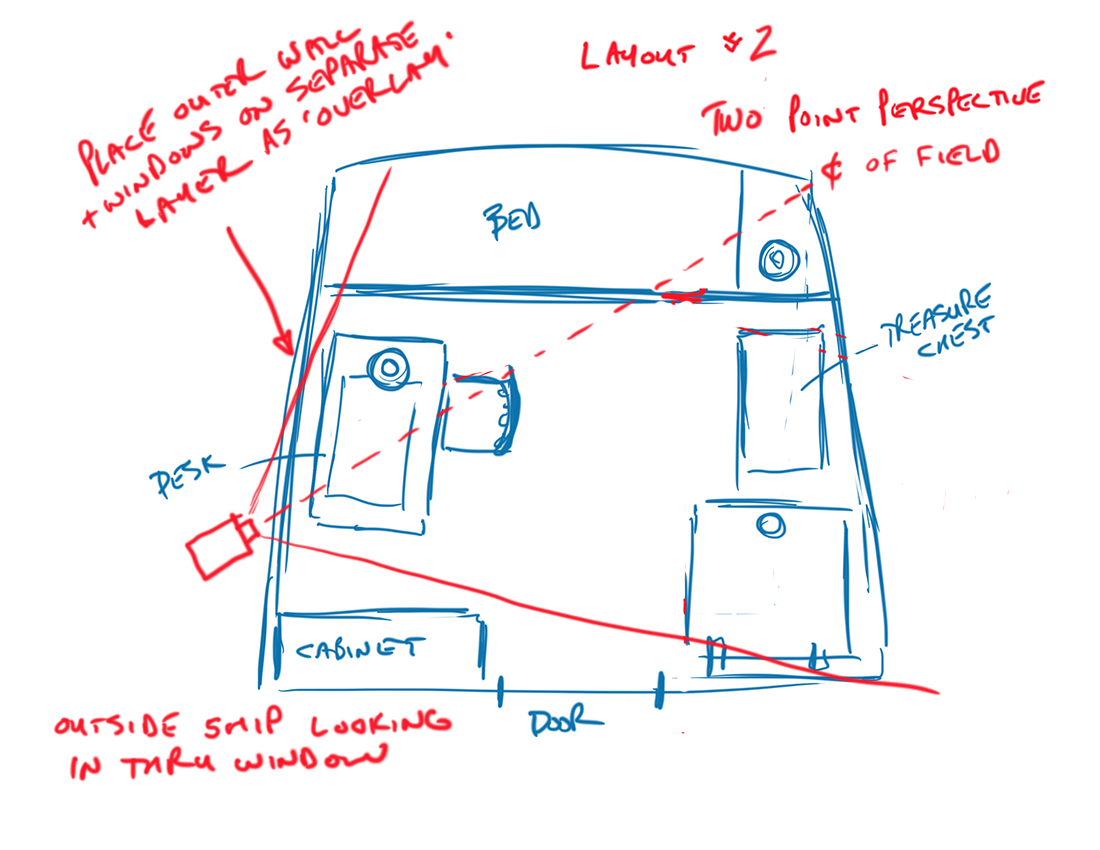
The next layout will be from outside the cabin, looking in through the window, so we'll do a separate overlay. I need a design for a brass candle holder to go on the desk. Same as the treasure chest, but this time I just need one 3/4 view and 2 orthographic drawings showing the side profile and the end profile - detailing the handle. Make it nice and ornate.
Layout #2
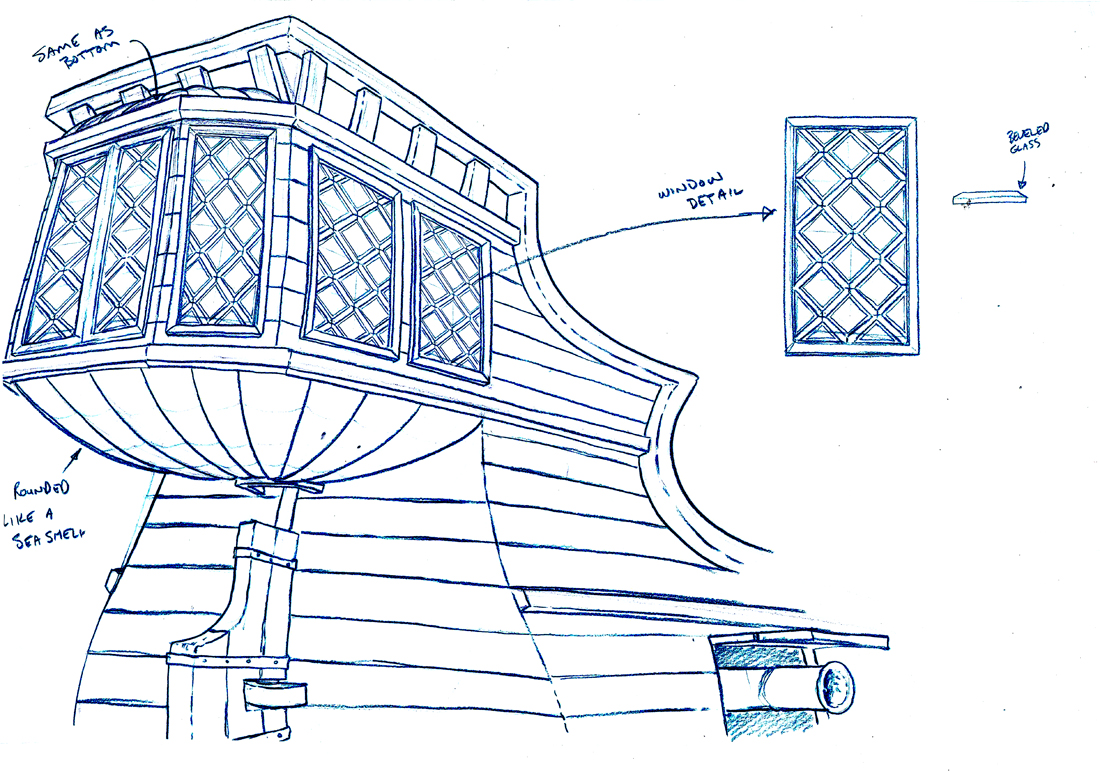
Position yourself just outside the cabin window that is closest to the desk. The horizon line is just 6 inches above the desk top and the center of your field is aimed at the pillow on the captain's bed. There is an open treasure map on the desk. The candle is to the left of the field of vision holding down the edge of the map.
Draw the interior of the cabin on one sheet of paper and on a separate sheet, draw the overlay of the exterior of the window.
11" x 17" - horizontal fielding.
This time I want you to design a pirate pistol. Same design sheet as the candle but give me a 3/4 view of the gun, and 3 orthographics: front, side and back.
Layout #3
This view will be as though you are standing just behind the captain as he sits in the chair. Your horizon line is at about 5 1/2 feet and you are looking down at the desk top. You should have a bit more than the entire desk within the field of vision. Match the placement of the map and the candle from layout #2. This time add the pistol to the other side of the map, holding the edge down. Should also see some of the window in the field.
Come up with a cool type of graphic for the treasure map.
11" x 17" - horizontal fielding.
Assignment #3 Dec 22nd
Let's move into some composition drawings. This is an assignment I used to give my students at Sheridan in and around 1991 when Beauty and the Beast came out. Use the teapot and cup design here and draw a series of thumbnail sketches showing the listed emotions and themes. You must show both the teapot and cup within the field. The camera angle can be from any point of view you want. Draw the surface grid as well (it can be larger if you're doing a long shot). No walls or ceiling are necessary unless you feel it will help the composition.
Do not add any facial expressions (what I mean here is don't add eyes or a face), action lines, sweat or anything other than what you see on the design sheet here. You can stretch and squash, form a brow from the rim or make the spout a mouth for expressions.
Joy, anger, fear, surprise, disdain, aggression, boisterous, mistrust, curious, stubborn, hopelessness, love, coy, humiliation, suspense.
This is a tough one. Take a couple of days to work on this.
Have fun!
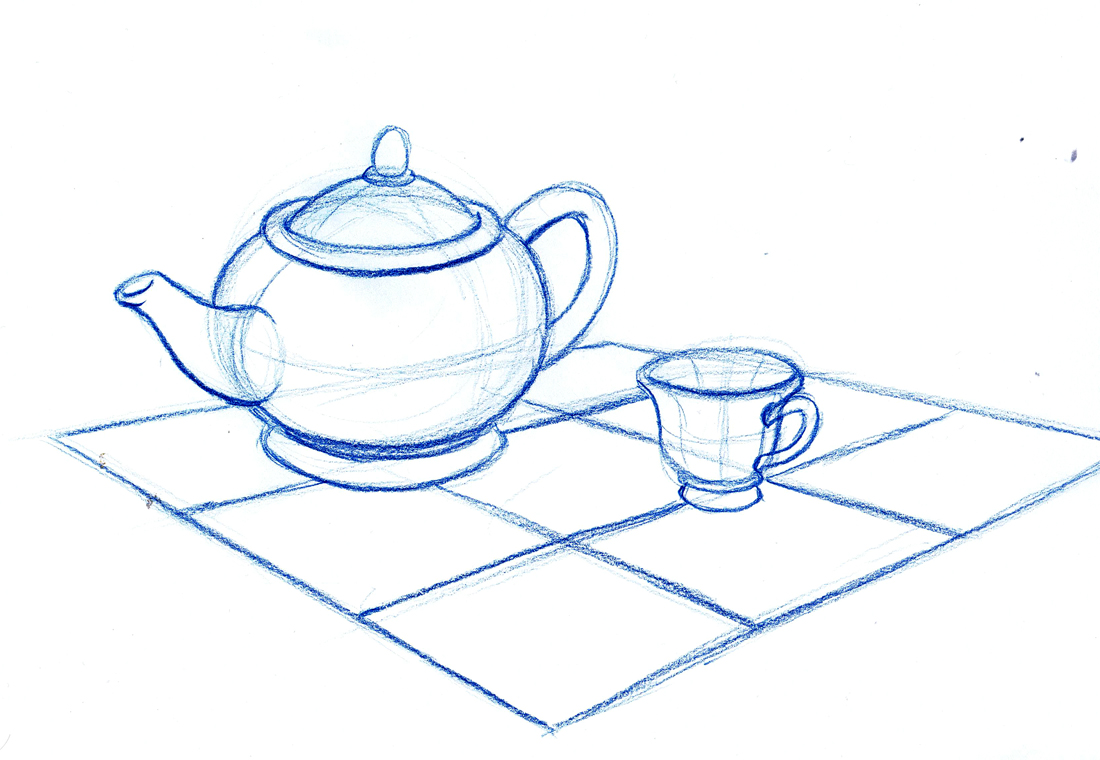
Here's some examples:

Assignment #2 Dec 18th
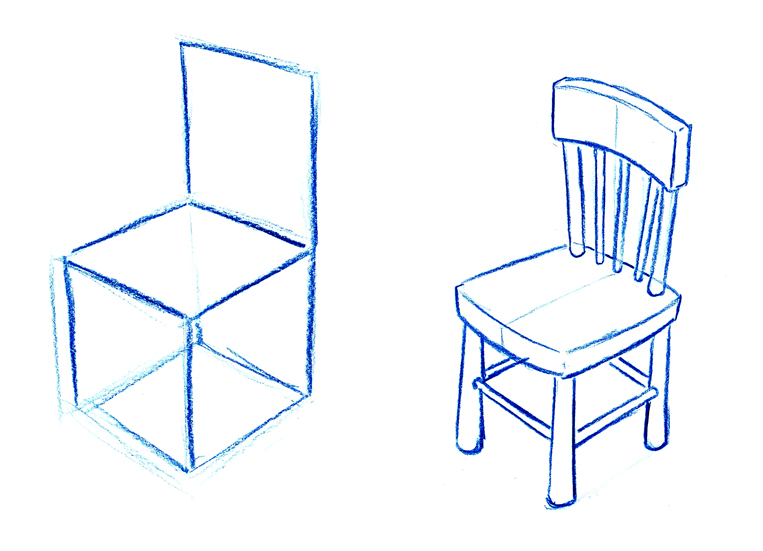
Using the simple design provided, (the stick figure is just for roughing the pose) draw the chair on the right from at least 10 different points of view. Use both 1 and 2 point perspective (and even 3 point if you feel bold enough). Vary your horizon line as much as you can without repeating the same level twice.
Assignment #1 Dec 16th
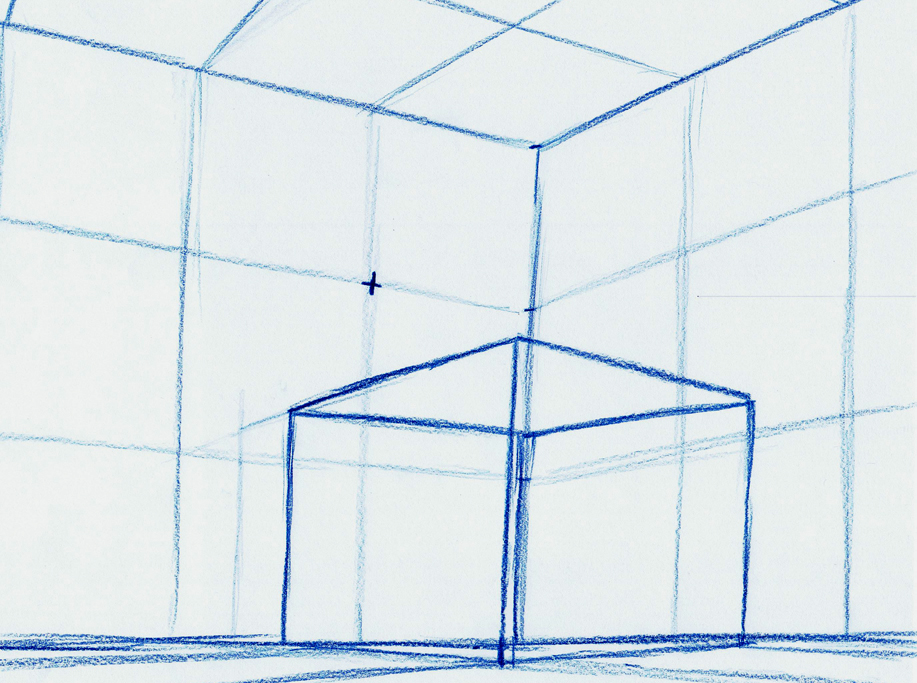
We'll start off with something relatively simple and then ramp things up over the 4 weeks. Print out the location design that I've attached. It's a simple cubed room that is 3 units high, 3 units wide and 3 units deep. In the very middle of the room is a 1 unit square cube. Along the edges, I've written numbers and letters to create co-ordinates. A, B and C are the positions of the camera, while D through I are the center of your field of vision.
I'll give you a list of 12 co-ordinates for the camera and a set of corresponding co-ordinates for the center of your field (or what you're to be looking at. Draw as many layouts as you want. Draw each layout horizontally on 11" x 17" paper. Draw the room with the grid lines for scale and draw the cube see through. Use a ruler if you want or you can draw it freehand.
I've also included a drawing that I did to give you an idea of how they should look.
| Camera Position | ¢ of field |
|---|---|
| 1 - A - 0 | 2 - F (2 point) |
| 2 - A - 1 | 3 - H (2 point) |
| 3 - A - 2 | 1 - E (1 point) |
| 4 - A - 3 | 1 - I (1 point) |
| 5 - B - 0 | 1 - E (1 point) |
| 6 - B - 1 | 2 - H (2 point) |
| 7 - B - 2 | 1 - G (1 point) |
| 8 - B - 3 | 2 - F (1 point) |
| 9 - C - 0 | 0 - D (1 point) |
| 10 - C - 1 | 0 - E (1 point) |
| 11 - C - 2 | 1 - H (1 point) |
| 12 - C - 3 | 2 - G (1 point) |
Cheat the camera positions a little to the inside of the room and off to the side of the given co-ordinates, slightly. Not a lot, just a tiny bit to avoid tangental lines and completely flat planes on the ceiling, floor and top or side of the box.
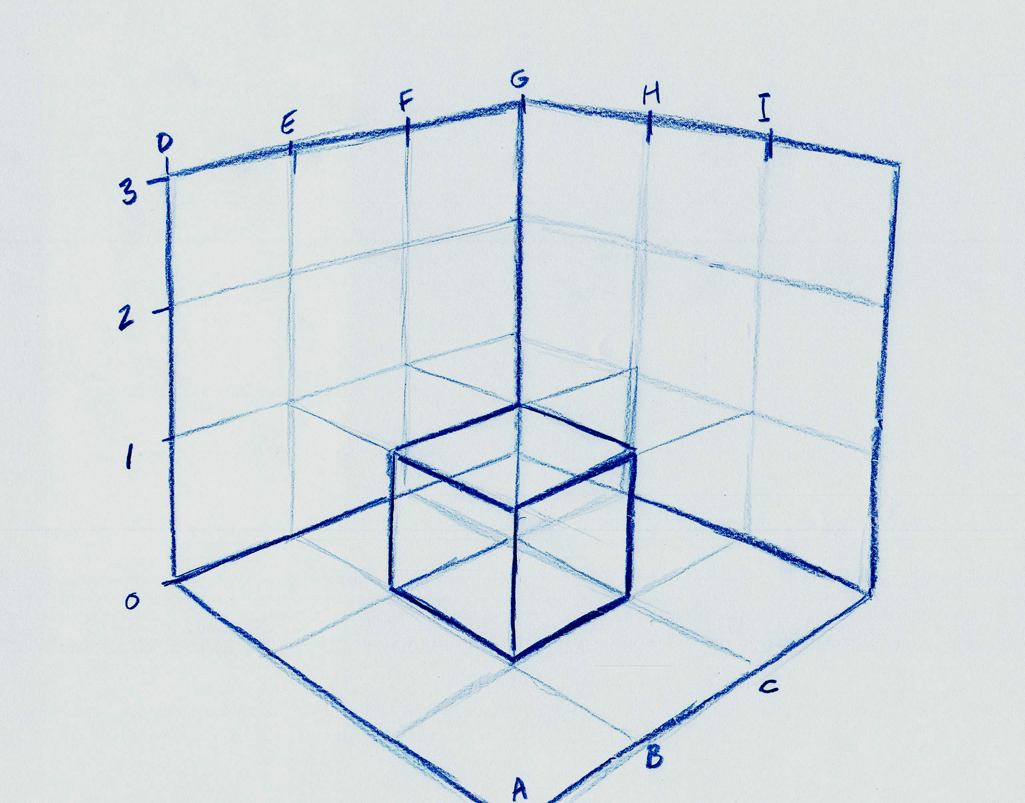
Here's the first view:
