Assignment
This is a single character assignment.
You are to animate a character of your own design in a run cycle. The character is to be centered on the page. The character cycles for 6 seconds and then trips over an object that you will pan in from off screen. You are to straight-ahead animate the character falling to the ground or stumbling and then regaining themselves, link back into the run cycle again for another 6 seconds.
The character can not come to a stop during the fall or stumble. You must keep the pan rate of the object they trip over at a constant rate until it pans out of the field.
As an added part of the assignment, you can draw a 5 field repeat pan backgrount to move behind the character throughout the scene. If you feel really amitious, make it a multiplane background, with each layer moving at a different rate, to create a 3D feel to the scene.
Principles Involved
• Acting
• Expressing an attitude or emotional state
•Working from your own character design
• Keys
• Inbetweens
• Timing
• Slo in & Slo out
• Stretch & Squash
• Overlapping Action
• Use of Arcs
• Weight
• Character
• Observation
• Flipping
Deadline
2 weeks (12 - 16 hours)
Grading
Assignment is worth 10% of the second semester grade
Animation will be graded in the following areas:
Grading
Animation will be graded in the following areas:
• Strong Key Posing
• Appropriate, Realistic Timing
• Overlapping Action
• Weight
• Balance
The animation must show appropriate squash and stretch, realistic timing, proper slo-in and slo-out on the arms, leg movements, torque, tilt, and twist in the pelvis and shoulders (if any) as per in-class lecture demonstration. Character must appear to have realistic weight on a proper one or two point perspective plane with horizon line at chest level when the character is standing.
Required Actions:
| • Run Cycle Action (Primary) (Overall Body) | ___/20 | |
| •• Successive breaking of body joints (Overlapping Action) (Legs, hips, shoulders, head, arms) |
___/10 | |
| • Torque | ___/10 | |
| • Trip Action | ___/20 | |
| • Timing & Balance | ___/10 | |
| • Recovery | ___/10 | |
| • Link back into cycle | ___/20 | |
| Total | ____/100 |
Work Schedule
Week 1
- Layout character positions for cycle, trip and recovery.
- Rough out primary keys to describe the basic action of the run.
- Rough out secondary keys indicating passing positions.
- Time out keys and pencil test to confirm timing.
- Make any adjustments necessary.
Week 2
- Draw inbetweens.
- Animate trip action - straight ahead.
- Pencil test.
- Import cycle animation into Premier.
- Draw and import object that character trips over.
- Time out pan movement
Thought Process
This is a pretty quick assignment in that it has only 8 drawings for the run cycle and probably no more than about 30 or so for the trip, depending on how you choose to animate the action and get it to link back into the cycle.
Begin the same way you would with the walk cycle: draw the two primary, full stride poses. Just remember, that in a run, both feet come off the ground.
Here are my first two poses cleaned up:
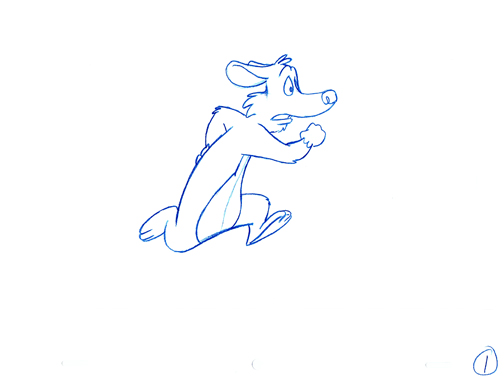
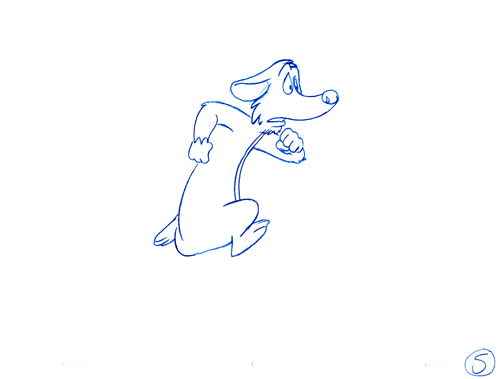
The two drawings are in opposition to each other, and don't forget about the arms being opposite the legs as well.
The next two poses are the crossing positions and also the low point of the run, since the body is coming down and the planted foot is bearing the weight, I've chosen to compress the leg by bending it here.
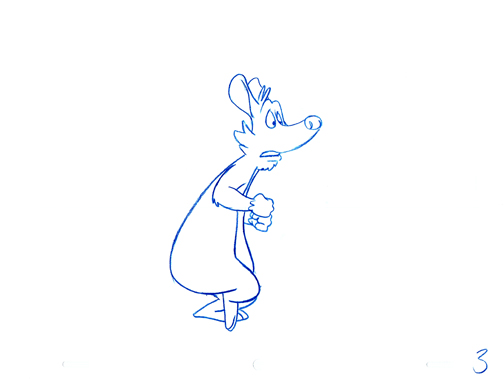

I followed the same animation theory that I used back in the double ball bounce assignment: I treated the pelvis as the bottom ball and the head as the upper ball and connected the two together by the line of the back. This creates a very nice overlapping action to the run.
I added even more overlapping action by having the nose, ears and tufts of hair on both the top of the head and the cheeks trail the movement.
There is just one inbetween to each of the four drawings shown here to create the 8 drawing cycle.
As you can see in the pencil test, if I shoot it on twos, it's pretty fast. in order for the action to look smoother, I need to add in single inbetweens to each drawing and shoot it on ones.
If I find that the timing is too fast, I can slow it down a bit by shooting the original drawings on threes and see how it looks:
Now, if I want to smooth the action out, I need to inbetween each of these original drawings on thirds, which is slightly more complicated than halves. Another option would be to shoot the first set of drawings on twos, and the new inbetweens on ones. This is what that would look like:
Here's the final version: 24 drawings, shot on ones. The timing is identical to the two pencil tests above, just much smoother.
If I wanted to fine tune the timing even more, I could turn this into either an 18 drawing cycle or a 20 drawing cycle, simply by removing every 4th drawing (to make it 18 drawings) or every 6th drawing (to make it 20). I know it's really hard to see the differences but here they are:
18 drawing cycle (I took out 2, 6,10, 14, 18, and 22)
20 drawing cycle (I took out 2, 8, 14, and 20)
Next, I need to animate the tripping action. For this, I need to know exactly what I want my character to do. I need to act it out or visualize it in my head before I start drawing.
First though, let's talk about straight ahead animation...
What is "Straight Ahead" animation?
Simply put, straight ahead animation is where you start with drawing #1 and then you do drawing #2, then #3, 4, 5, 6, and so on throughout the entire scene until you're done. The type of action that your character is doing will determine whether or not you should use straight ahead or pose to pose, or a combination of the two.The main advantage to using straight ahead animation is that it is very spontaneous and creates a very natural flow to the action you're animating. It's very similar to "improv acting" where you just kind of make it up as you go along.You should be aware that there are many disadvantages to straight ahead animation as well; you can begin to lose control of the action and it can veer away from where you really want it to go in the scene. You won't know what it looks like until you've finished every single last drawing in the scene. With key animation, you can do a pencil test with just the keys, then play around with the timing, and then do your inbetweens knowing exactly how it's going to turn out. For example, let's say the scene is 10 seconds long. That's 240 frames or 120 drawings on twos. If you do two keys for each second, that's 20 drawings. You do your pencil test to the timing you've blocked out, make adjustments and even if you have to redraw all of them, that's only 20 drawings wasted.
If you straight ahead, you have to do all 120 drawings before you can see what it looks like, that's 6 times as many drawings. That's a lot of work.This is not to say that with straight ahead animation, you just blindly start drawing and make up each drawing as it comes along, that's kinda dumb. You should still know what the character(s) are going to be doing and act the action out first. At the very least, plan it out in your head.The real proper thing to do would be the following:
1) Think about what you want the characters to do.
2) Act the action out yourself. Get someone else to act it with you. Video tape yourself, then watch and study the tape intensely. If you can single frame through it, then do it. (Some people think this is cheating - it's not! It's observation and study.)
3) Draw a series of thumbnail sketches that catch the main points of the action. Write notes and draw arrows to indicate what's moving where. Even indicate timing if you can (this action took 1 second or 24 frames, etc).
4) Pencil test the thumbnails.
5) With the thumbnails posted on your desk, begin your straight ahead animation, knowing that you need to hit the poses that you've thumbnailed throughout the scene (this will keep you from wandering too much).
6) If you veer off the thumbnails but the action still works, then go with it, just don't lose control.This is a slight variation of pose-to-pose animation but the key point is to plan. Remember the old saying: "If you fail to plan, then you plan to fail".
Trip Action
So for my character, I've decided to have him trip and land on his head three times before recovering back into the cycle. I've planned the action in my head and so I just start with the first drawing out of the cycle, which for me was drawing #7 and then I moved through the action.
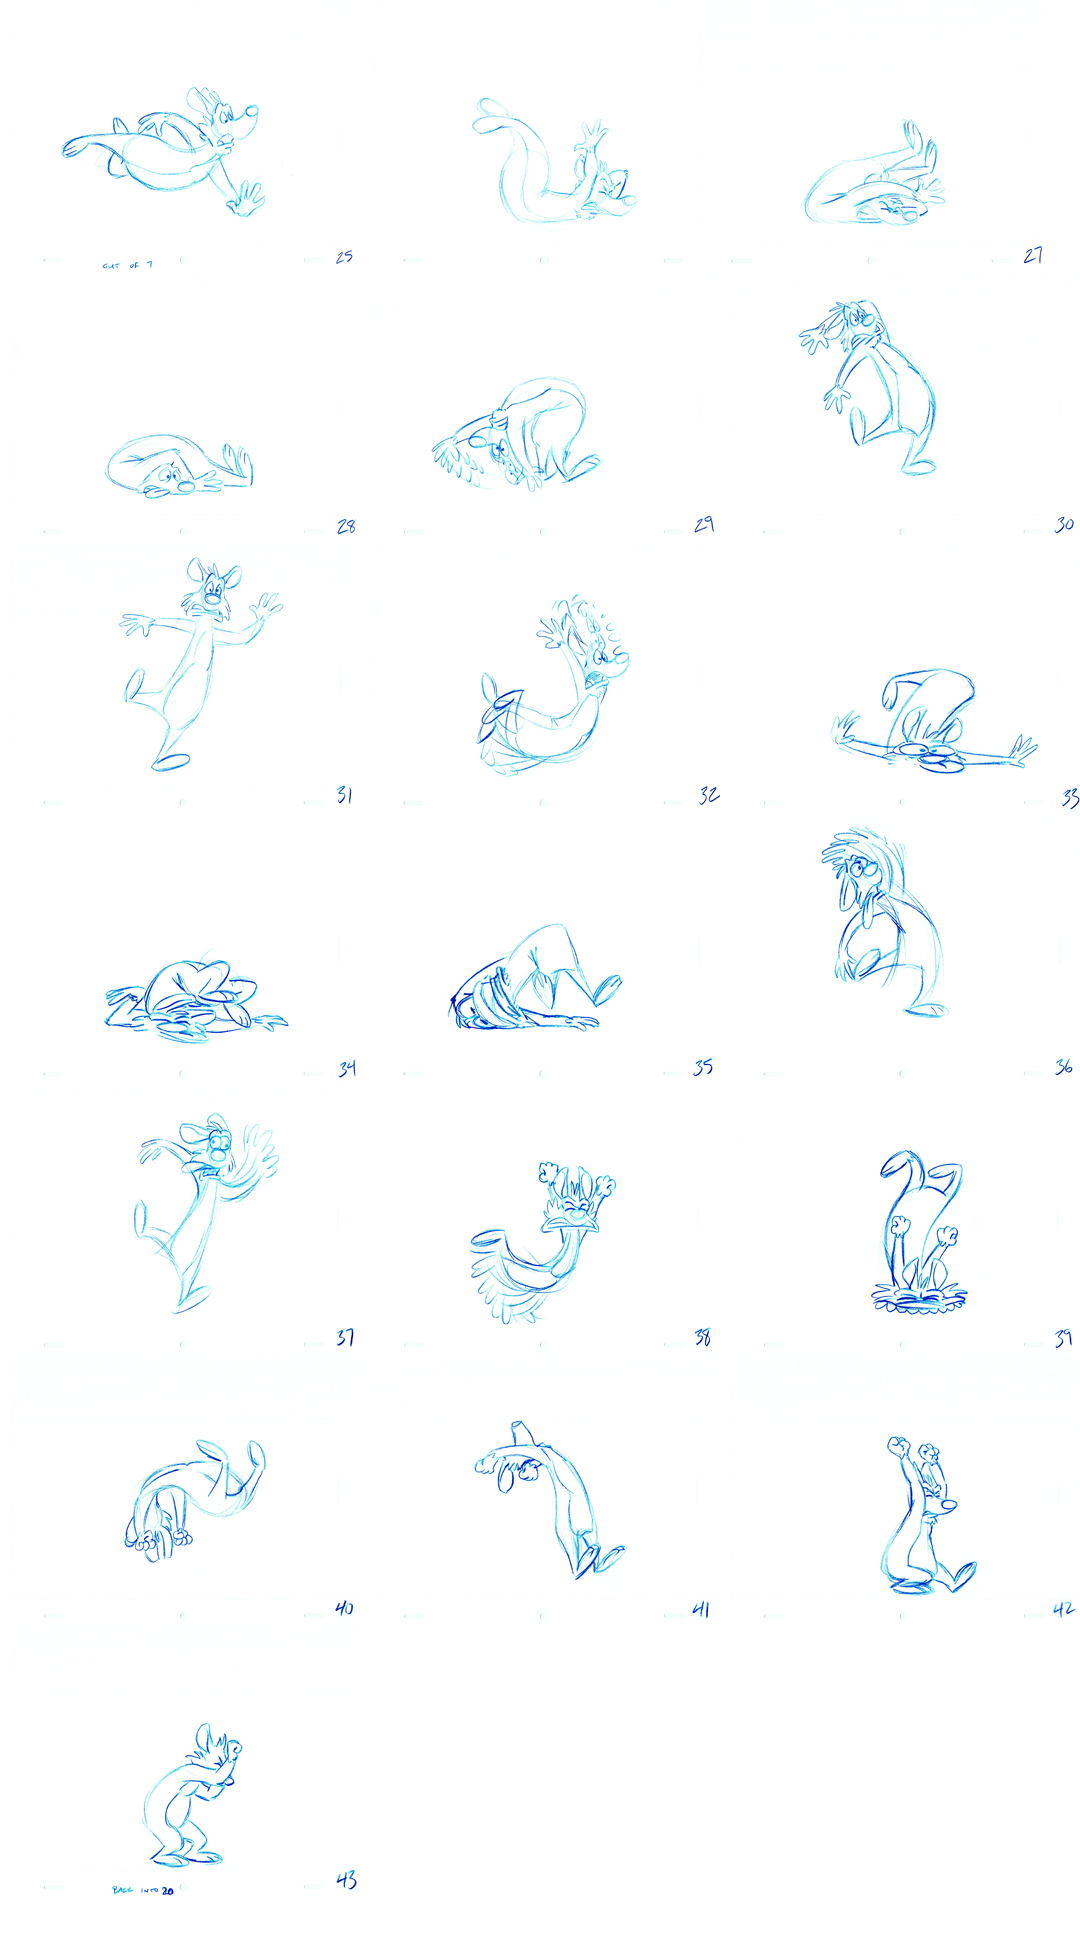
I then did a pencil test to check the timing and linking of the action in and out of the trip. I knew as I was doing the drawings that I would need to add some inbetweens, especially between drawings 29, 30, and 31, as well as 35, 36, 37 and 39 to 43. These were the high points and I wanted the action to be slower at the top and then fast into the ground. Now, just because I do some inbetweens here, doesn't mean this is no longer straight ahead animation (not that it actually matters what you call it anyway), you can do anything that you want with your timing. The primary thing here is that it looks good. Whatever you need to do, do it.
Here's the pencil test of the animation with a bit of the run before and after.
The version on the left is shot on twos with some 6 frame holds on the high point drawings. This has only the drawings shown above.
The version on the right is retimed with some drawings on twos and some on ones and all the main inbetweens done (except for the end hookup).
The linkup still needs a bit of smoothing out with some recovery down and then back up. This will probably modify the point that I link back in a few drawings later.
Reading Assignment
Read pages 231 - 251 of the Character Animation and Lip Sync book to see the Walk and Trip variation of this assignment.